Introduction
Hey there, thanks for choosing Hemma!
Hemma is a WordPress theme for guest houses, hotels, hostels, resorts, residence, spa, farm houses, country houses, threehouses, holiday houses, bed and breakfasts, cottages, agriturismo, cascina, villas, lofts, ... and so on and so forth!
It comes with 5 useful custom post types (Rooms, Events, Foods, Deals, Guest Posts) and many theme options. Also, it is compatible with with Polylang (a free WordPress plugin to create a bilingual or multilingual WordPress site) and the popular WPML (The WordPress Multilingual Plugin).
What's included
In the package you have downloaded you will find:
- The WordPress theme
- Sample files to configure the theme as you can see it on our demo
- The documentation (we guess you’ve already found it!)
Browser compatibility
Hemma theme is fully compatible with Chrome, Safari, Firefox, IE10+ and iOS latest versions. Currently you may experience some issues with IE9. IE8 and lower versions are not supported.
Installation
The process to install a WordPress theme is very easy and quick.
To start, extract the .zip file that you have downloaded. The file is named Hemma 0.0 Package.zip.
There are two ways to install a WordPress theme:
-
1. Connecting to your Hosting Server
Using an FTP App like FileZilla, connect to your hosting server using your ftp address, username and password. Locate the path to your WordPress installation and navigate to wp-content – themes. Upload the folder named Beetle.
-
2. Via WordPress
After logging in your WordPress Dashboard, navigate to Appearance – Themes, click on Add New, then on Upload Theme.
Now, click on Choose file, select the zip file named hemma.zip and finish clicking Install Now. -
Activating the theme
After having installed the theme, click the Activate link to activate the theme.
-
Install the required plugins
To take advantage of all Hemma options, you need to install some plugins. If you have just activated Hemma, you can read on your admin pages a message box saying that there are some required and recommended plugins that need to be installed. Click on Begin installing plugin to install them and then on Begin activating plugins to activate them.
Remember to not deactivate the required plugins
Please keep in mind that if you deactivate any of those plugins when your site is live, you may break it. If you do that by mistake, don't need to be worried, there's nothing you are going to lose: the only thing to do is to activate them again.
Here is the list of the plugins required/recommended by hemma:
- Hemma Custom Post Types (required): it is a bundle plugin created for Hemma adding the mentioned above custom post types (Rooms, Events, Foods, Deals, Guest Posts)
- Hemma Instagram (deprecated since 1.4.16): it is a bundle plugin created for Hemma to display an Instagram feed on your site
- Hemma Shortcodes (required): it is a bundle plugin created for Hemma adding some useful shortcodes for displaying buttons, maps, socail links and the current year anywhere in the site
- Social Feed Gallery (recommended with 1.4.16 and up): a plugin to display an Instagram feed on your site.
- Kirki Toolkit (required): a plugin that extends the Customize option panel.
- CMB2 (required): a plugin that extends the default WordPress functionality adding custom fields to posts, pages and the other custom post types.
- CMB2 RGBa Colorpicker (required): a plugin that extends CMB2 adding a RGBa colorpicker functionality.
- Contact Form 7 (recommended): install it if you need a contact form anywhere on your site.
Hemma has been tested (and it's fully compatible) with some other WordPress plugins like Polylang, WPML, Yoast SEO, WP User Avatar, Google Analytics by MonsterInsights, W3 Total Cache, etc.
-
Everything is on the right track!
At this step, here is how your blog will look like. If you expected an homepage like the one on our demo, don't worry about that, we are going to show you how to configure the theme.
OPTIONAL STEP: import the demo content to quickly configure the theme as you can see it on our demo.
Theme Options
Configuring Hemma theme is a very simple task: navigate to Appearance - Customize to see all the available options.
The theme options can be found in Appearance - Customize. Please remember that most of the options will not work unless you install the Kirki Toolkit plugin.
-
Site Identity
In this section you can change the website title, tagline and browser/app icon.
-
Typography
Pick your favourite Google Fonts for the body, headers and subtitles.
-
Header Settings
Available options:
- 4 Header Layout configurations
- Set the Header Position. Two available options: Overlayed [1] or Static [2]
- If you wish to use an image as logo you need to upload the following images:
- Logo Image: It's the logo image shown on white background. Recommended image height is 60px.
- Logo Image Retina: A retina logo image is the same as the normal logo image, though twice the size. For example, if one's regular logo image is 60x60 pixels in size, the retina logo image would need to be 120x120 pixels in size.
- Logo Image (white version): It's the logo image shown on image backgrounds. Recommended image height is 60px.
- Logo Image Retina (white version): It's the retina logo image shown on image backgrounds. Recommended image height is 120px.
- Logo Image Width: Set here the width of your logo image at normal resolution (e.g. If you logo image is 60px tall and 110px wide, type here 110px).
-
Layout Settings
Available options:
- Choose your Website Layout: Wide [3] or Framed [4].
- Accent color: Choose the accent color from the theme palette for hyperlinks and other interface elements.
- Radius Setting: Add rounded borders to images, buttons and forms.
- Preloader: Enable to display the progress indicator screen during the page load.
- Block Reveal Animations: Set On to enable block reveal animations on scroll.
- Custom CSS: A special field where you can type your custom CSS.
-
Post Settings
In this section you can enable or disable the author box on blog posts. You can enable or disable comments on room, event, food and deal single posts. You can set the number of room, event, food, deal and guest post posts to show on each respective page.
-
Social Links
Fill the fields with the URLs of your social pages. To display your social icons anywhere in the website, use the shortcode
[social-buttons]. Enable/disable or rearrange the order of your social icons from the Social Links Order option. -
Google Maps
Google Maps requires an API key to correctly work. Get your key and paste it there.
-
Footer Settings
In this section you can choose whather to show or not the whole footer and adjust the width of each footer widget area. Use the Bottom Notes field to add extra notes at the very bottom of the site.
-
Menus
That's a default WordPress section. Configure it to edit your menus. You can also edit menus from Appearance - Menus.
-
Widgets
That's a default WordPress section. Configure it to edit your widgets. You can also edit widgets from Appearance - Widgets.
-
Static Front Page
That's a default WordPress section. Configure it to edit your static front pages. You can also edit these settings from Settings - Readings.
[1] Overlayed header
[2] Static header

[3] Wide layout
[4] Framed layout
Room, event, food and deal post types
Learn how to add room, event, food and deal posts.
Hemma comes with a bundle plugin providing 4 special custom post types for the host who wants to showcase his own rooms, events, food and deals. Don't forget to install and activate the Hemma Custom Post Types plugin or you will not be able to use them!
Just to avoid confusion ...
- The room single post refers to a specific room page
- The room page refers to the page containing all the room single posts
-
Create a room page
Before adding your room single posts to the website, we need to create a room page that is going to contain them. Navigate to Pages – Add New. Choose a title (e.g. Rooms), then select the template Room page in the Page Attributes module on the right and click on the blue Publish button.
Then you need to set a backgound image for your room page. There's a module on the right called Featured Image: click on Set featured image and upload the picture you want to show on your page.
Now, configure the Post Summary Settings module to define the aspect of your room single posts in the page. You can decide to show or hide the subtitle, the meta informations (i.e. the icons with labels), a button post link, etc.
-
Add room single posts
Navigate to Rooms - Add New. Choose a title for your room and set a Featured image. Please notice that you have a lot of extra field for this custom post types, here is a picture [5] showing what each field corresponds to in the single room page.
Use the Post Summary module at the bottom of the page to provide a short description of the room to be shown in the room page.
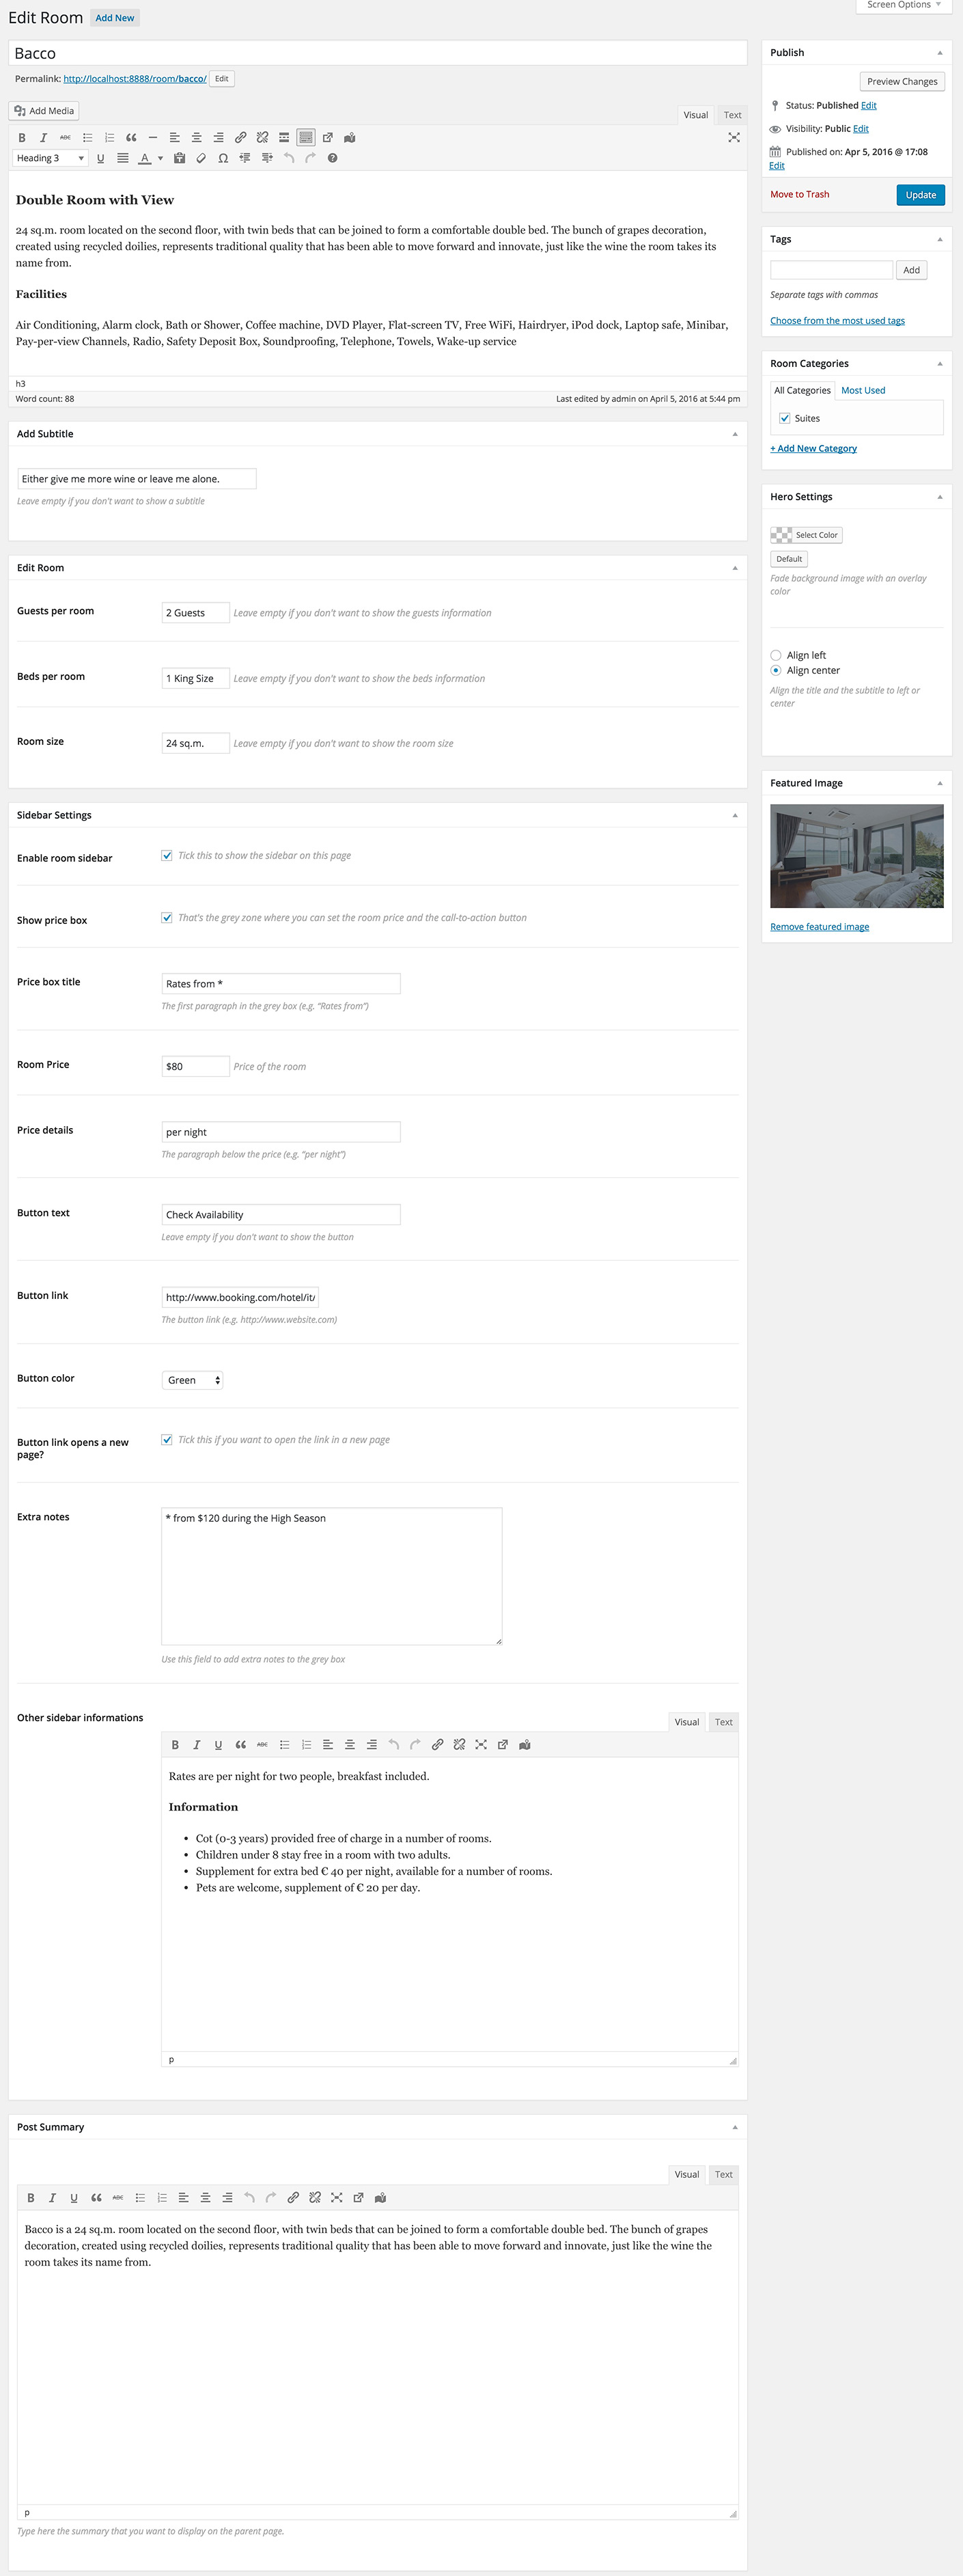
Room page (Back end)
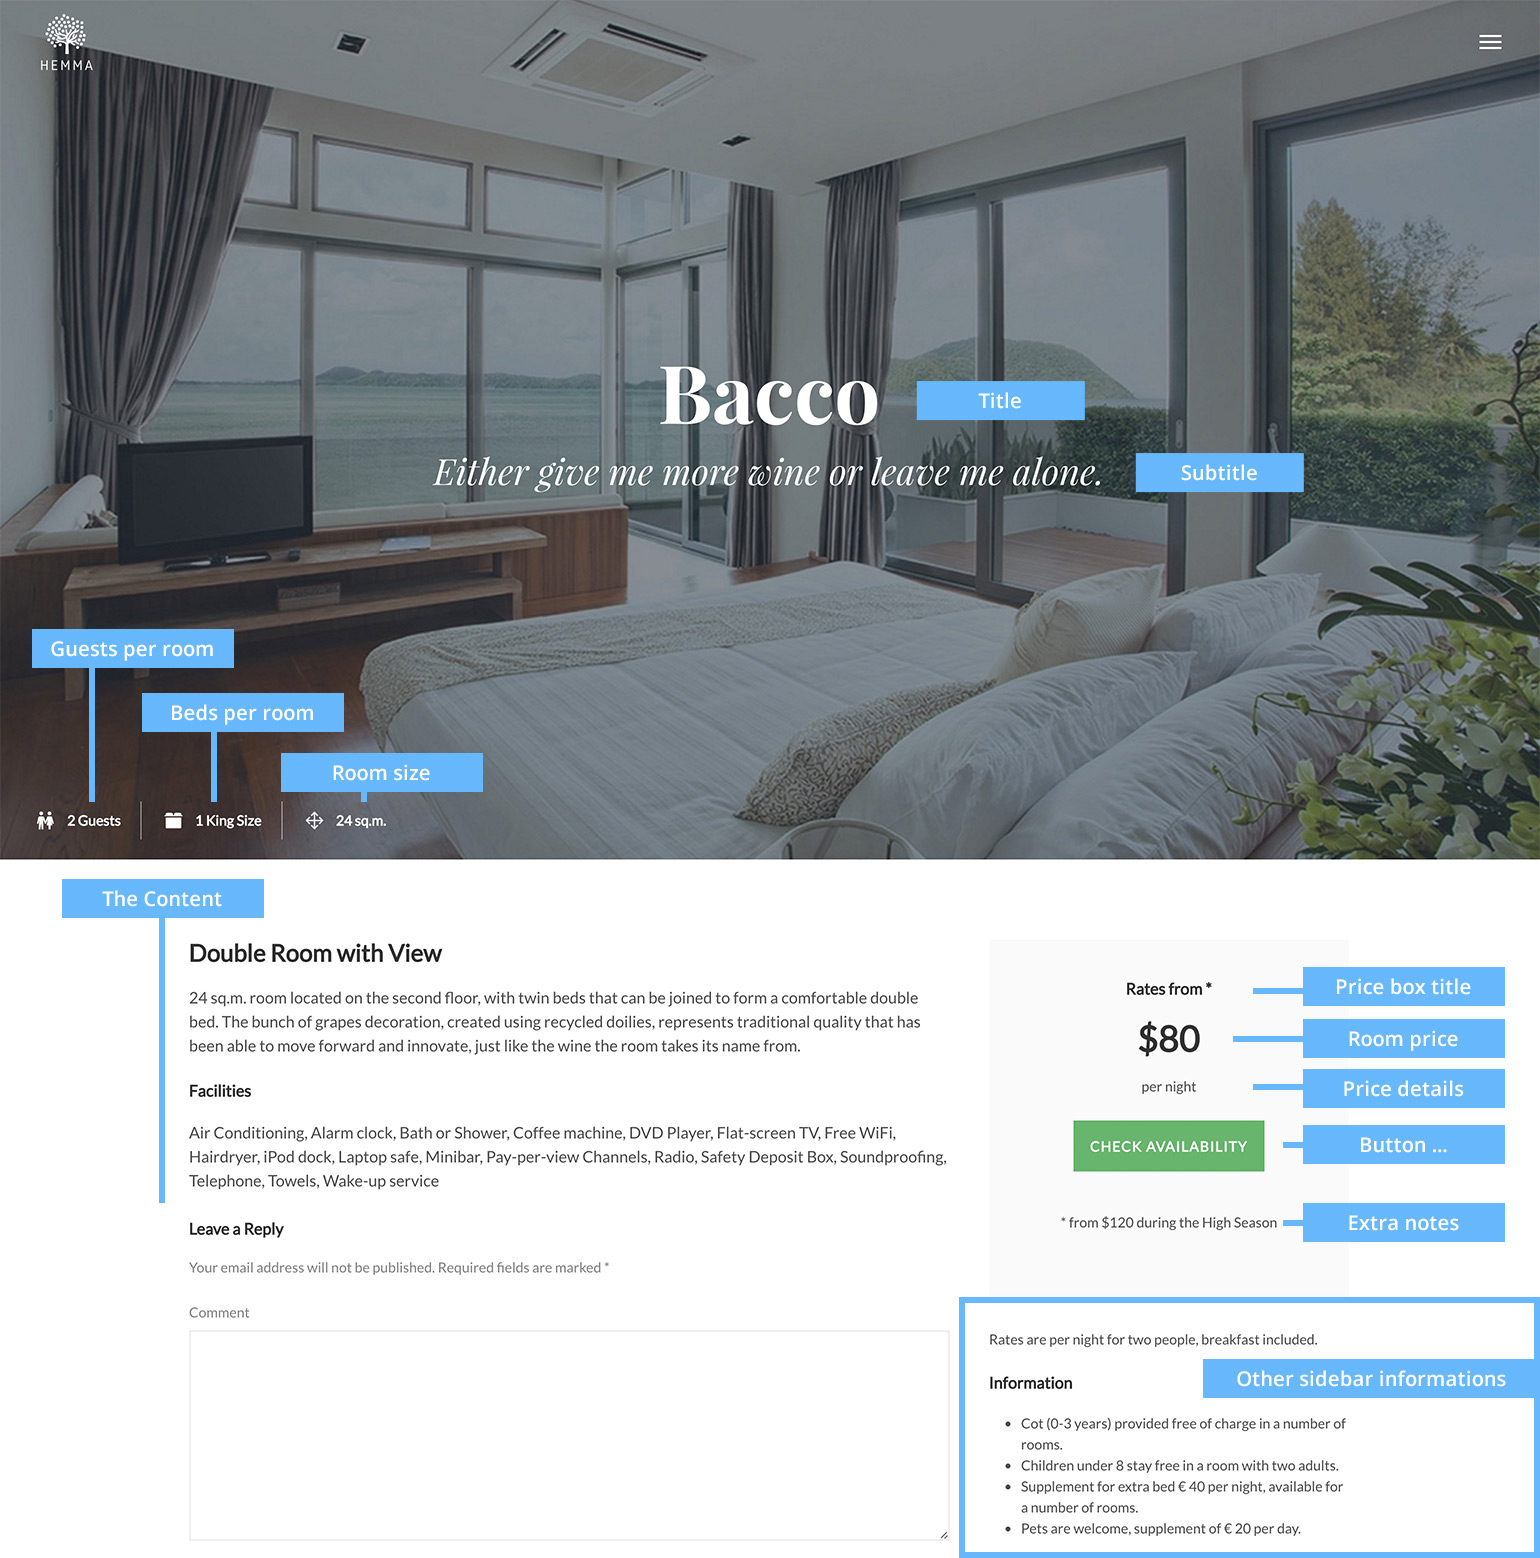
[5] Room page (Front end)
-
Event, food and deal post types
The logic of event, food and deal post types is almost identical to that in the room post type described above. Refer to the Create a room page section to learn how to create an event, food or deal page and to the Add room single posts section to learn how to add an event, food or deal single post.
Create static pages
Find out how to create static pages for your site.
Creating pages is really easy, all you have to do is navigating to Pages and click on Add New. Choose a title and publish it. [6]
If you want to create a page including an hero image[7], assign the Page with Hero template in the Page Attributes module on the right and click on the blue Publish button. Then set the Featured Image and feel free to add a subtitle.

[6] Default page
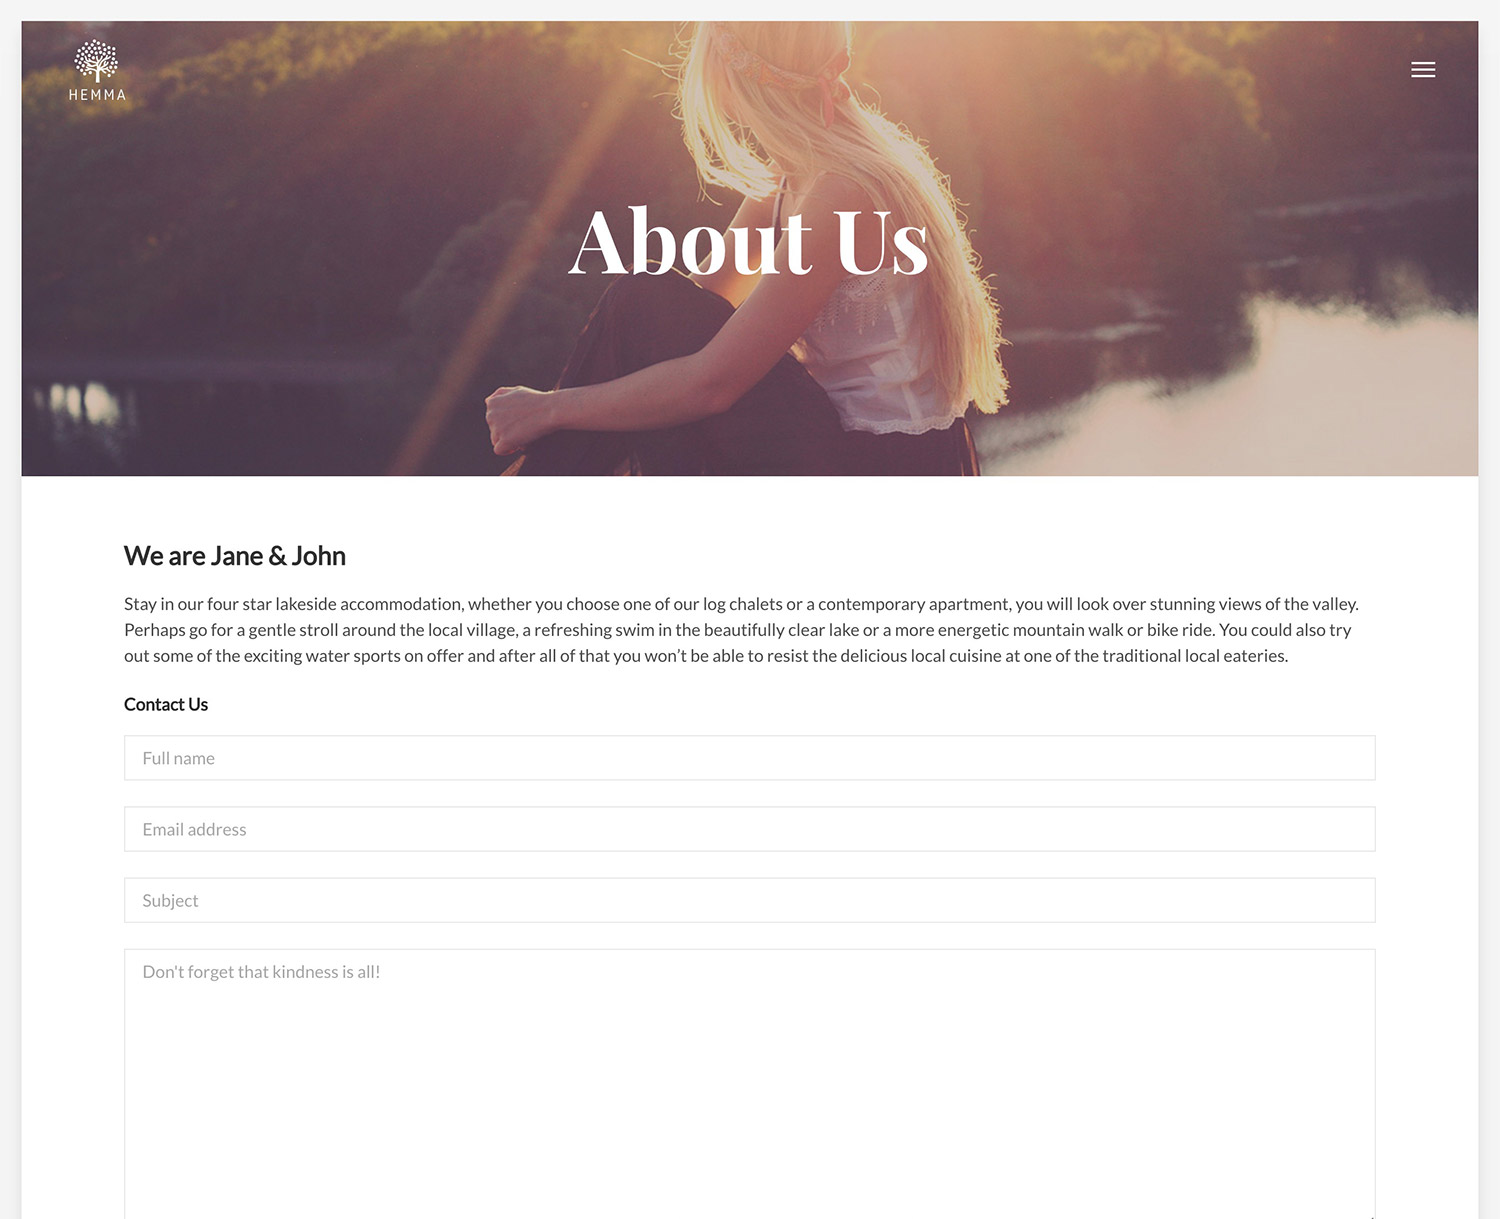
[7] A page with hero
Create a blog page
Here is how to create a static blog page for your news.
Navigate to Pages – Add New. Choose a title and publish it. Then navigate to Settings – Reading, enable the option A static page under Front page displays and use the page as Posts page.
Create a custom homepage
Here is how to create a custom front page like the one shown on our demo.
Hemma theme provides a special template called Composer page. This template allows you to build custom pages made of blocks. Let see how to create one!
Navigate to Pages – Add New. Choose a title (e.g. Home), then select the template Composer page in the Page Attributes module on the right and click on the blue Publish button.
If you want this page to be your homepage, navigate to Settings – Reading, enable the option A static page under Front page displays and use the page as Front page.
Now you can start to compose your homepage.
Compose the homepage
First of all set a backgound image for your homepage. There's a module on the right called Featured Image: click on Set featured image and upload the picture you want to show on your page.
Now let's come to the Block Builder module. The interface is quite intuitive. To create a new block, choose a Block Type from the dropdown menu. Hemma comes with 7 types of block:
- Custom split block [8]
- Custom full background block [9]
- Blog feed [10]
- Instagram feed [11] (it requires the installation of the Hemma Instagram plugin )
- Single Room post (since v1.3.1): now you can easily display a specific room post as block.
- Single Event post (since v1.3.1): now you can easily display a specific event post as block.
- Single Food post (since v1.3.1): now you can easily display a specific food post as block.
- Single Deal post (since v1.3.1): now you can easily display a specific deal post as block.
- Guest Posts carousel [12]
- Map - Split block [13]
- Map - Full width [14]
Now click on [+] Show more options to expand the block panel and fill the fields. If you want to rearrange the blocks, use the UP/DOWN buttons at the bottom left corner of each block.
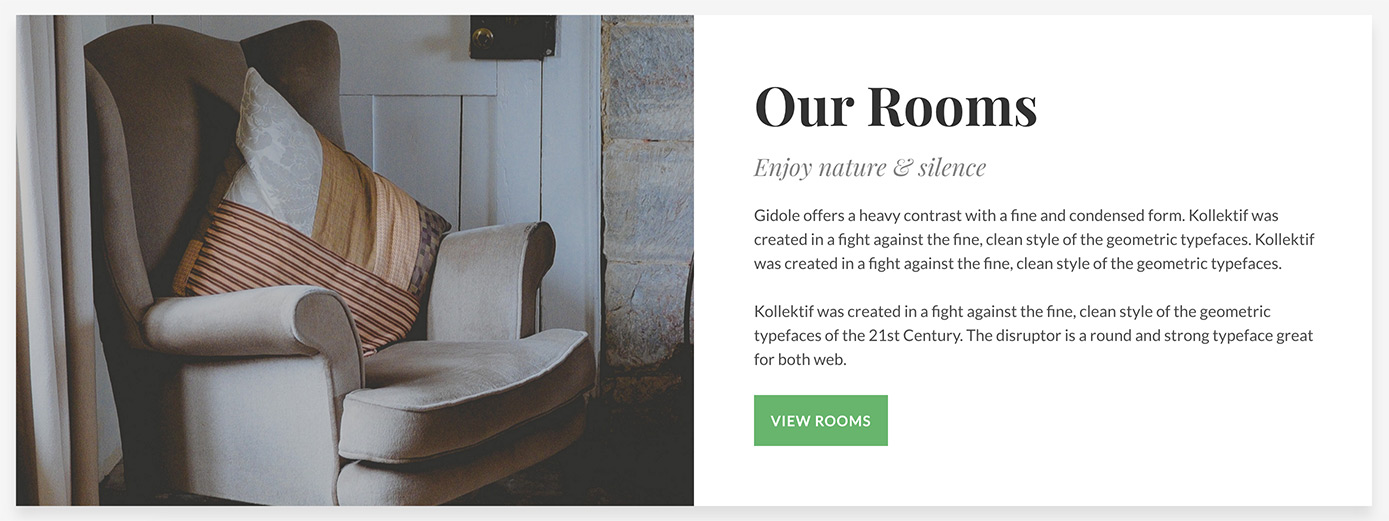
[8] Custom split block
[9] Custom full background block
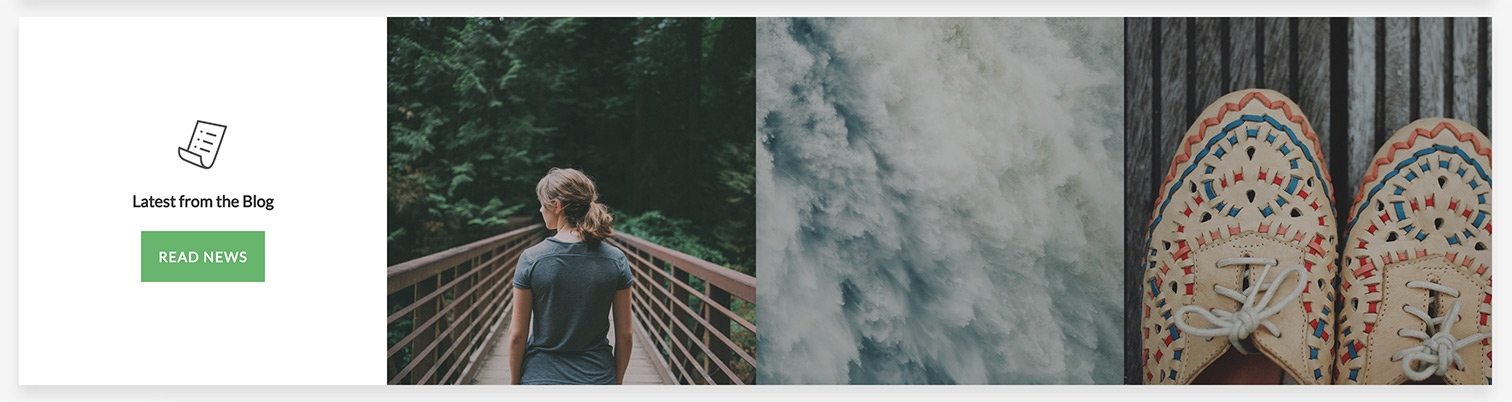
[10] Blog feed

[11] Instagram Feed
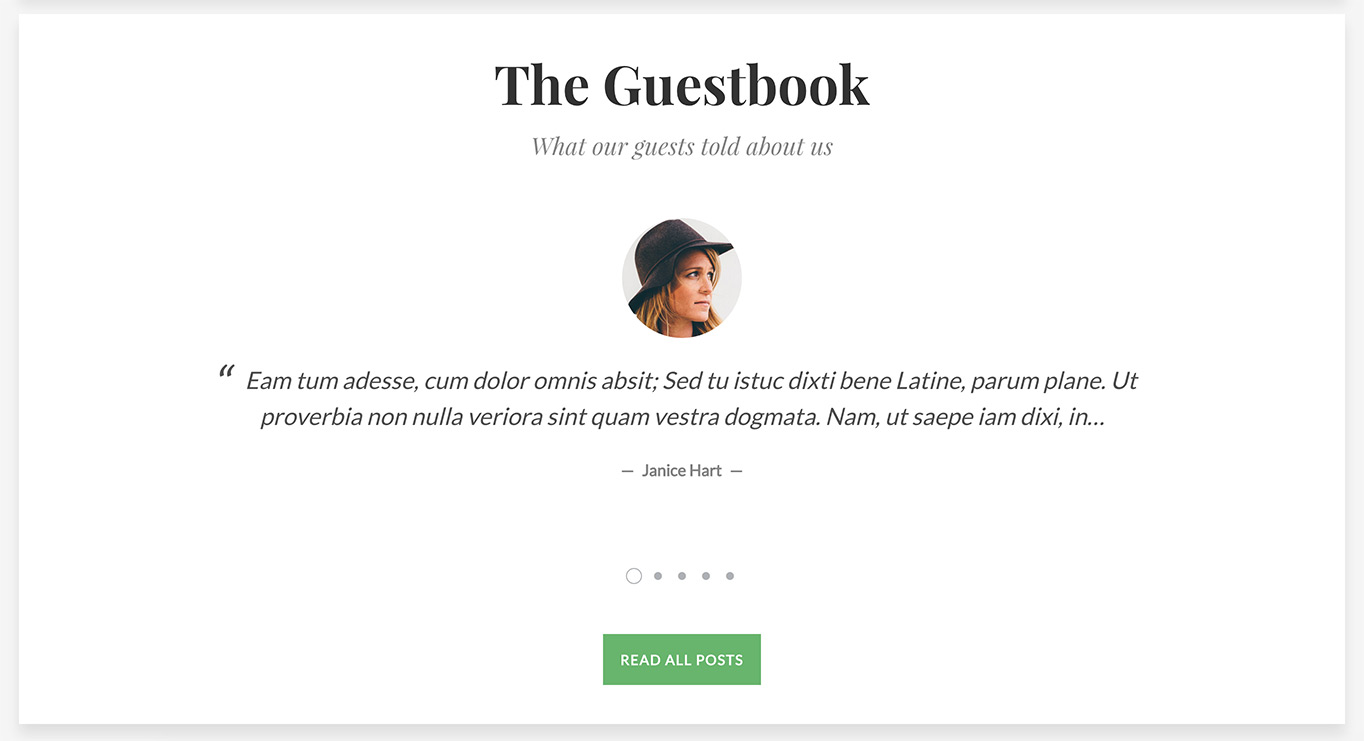
[12] Guest Posts carousel

[13] Map - Split block
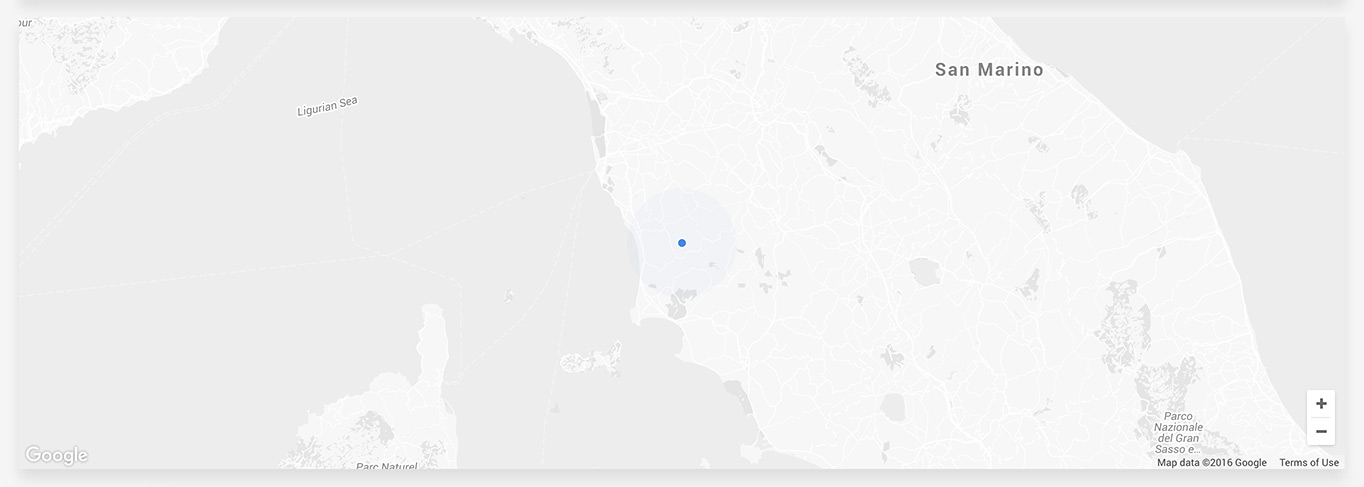
[14] Map - Full block
Good News
You can use the Composer template on multiple pages!
Hero configuration
Learn how to configure hero sections.
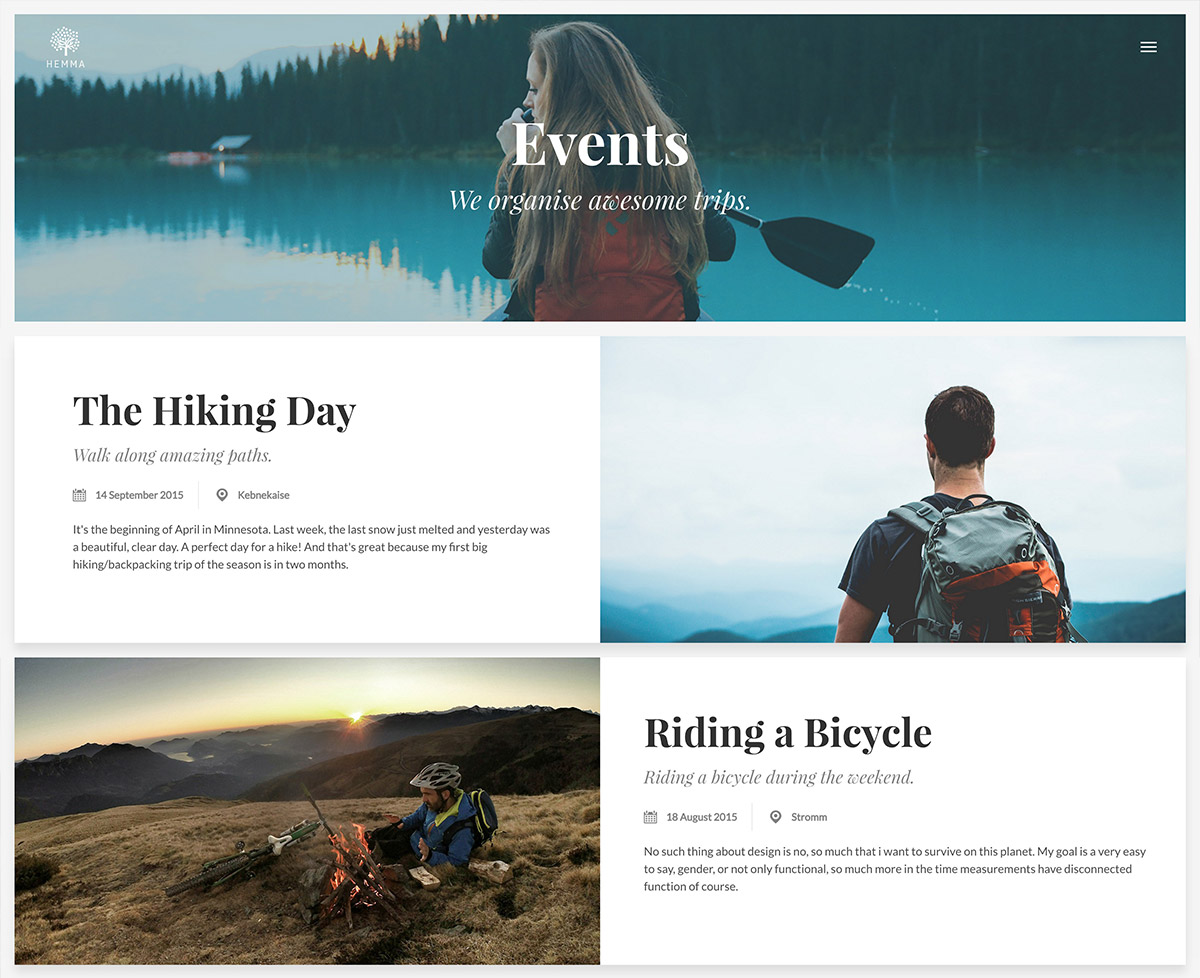
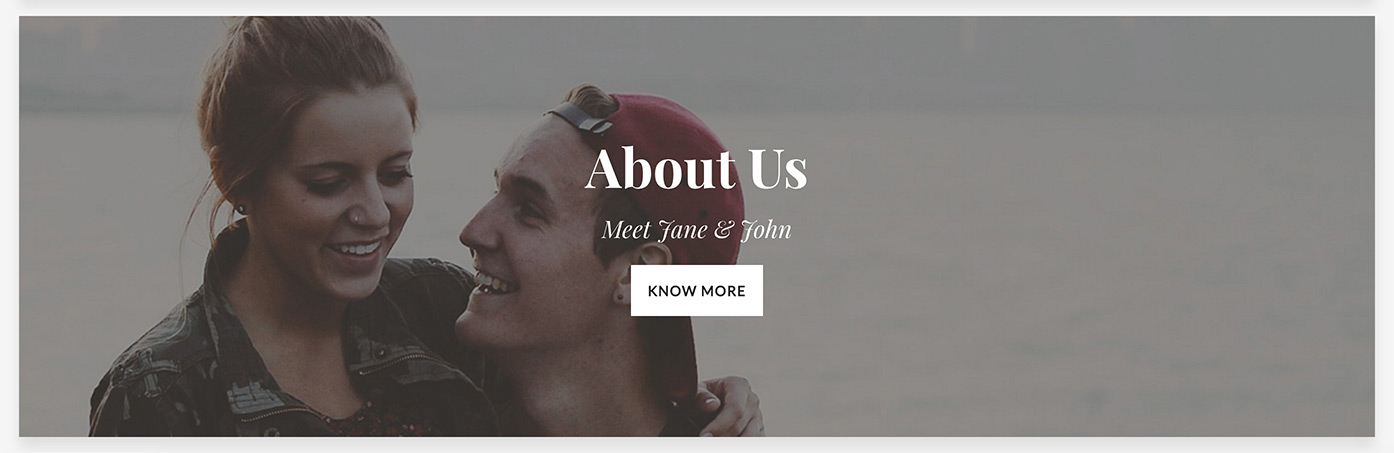
Just to make things clear, let's start saying that the hero is the first full-width image in the page. [15]
[15] This is a hero!
The hero option is avaliable on the following pages/posts:
-
The pages using the listed templates:
- Composer page
- Room page
- Event page
- Food page
- Deal page
- Guest Post page
- Page with Hero
-
The listed single posts
- Single room post
- Single event post
- Single food post
- Single deal post
Hero Settings
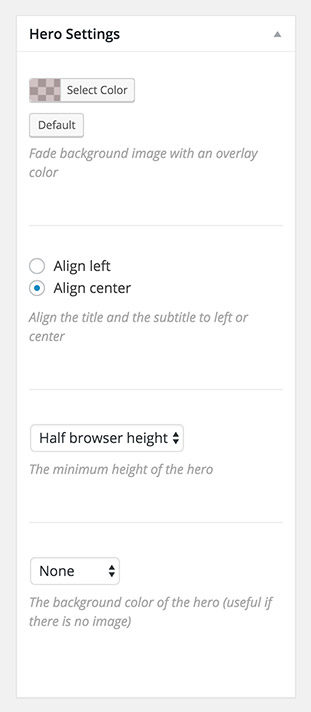
[16] Hero Settings module
The hero comes with a bunch of options you can edit from the Hero Settings module box[16] on the right side of the page/post you are currently editing:
- Overlay color: As the hero normally contains a title and an optional subtitle, you may need to darken the image in order to improve the text visibility. Click on Select Color and play with color/opacity cursor in order to get the right tone.
- Text Alignment: If you want the text aligned to the left or to the center.
- Hero height: The minimum height of the hero (Content Height, Half browser height or Full browser height.
- Hero background color: You may need to set a background color in case you don't have a featured image to show in the hero area.
Hero recommended image size
In order to get sharp images without affecting your site load performance, the recommended width is 1500px.
Lightbox galleries
Hemma takes advantage of a lightbox javascript plugin called . Find out how to use it.
If you wish to open your post images in a lightbox gallery, navigate to Appearance - Customize - Layout Settings and Enable Lightbox.
Add a lightbox image
When adding an image, you just need to enable the option Media File under Link To setting from the right sidebar.
Add a lightbox gallery
To create galleries on your posts, click on Add Media, then on Create Gallery on the left. Select the images you want to display and click on the Create a new gallery blue button. Now, from the Gallery Settings right sidebar, enable the option Media File under Link To, set the number of columns (Hemma only supports 1, 2, 3 and 4 column layouts) and set the image size (Medium Square is recommended). Click on the Insert gallery button. That's it!
Shortcodes
In this section we are going to see in detail the shortcode to create buttons, social links and maps.
Hemma comes with a bundle plugin providing four shortcodes to be used on any page or post. Don't forget to install and activate the Hemma Shortcodes plugin or you will not be able to use them. Here's the shortcodes list:
-
Button
It's a self-closing shortcode (i.e. it does not require any closing tag) that you can use to create buttons. You can add the shortcodes via the built-in button in the editor [17] or manually.
Usage example:
[button text="View More" url="http://www.opendept.net/" color="green" open_new_tab="true"]Option name Type Required Description text text Yes The text on the button url url No The button link color text No A color from Hemma palette. Allowed values: red, orange, yellow, green, light-blue, blue, purple, pink, brown, dark, white open_new_tab bool No true if you want to open the link in a new page. Default: false -
Map
It's a self-closing shortcode (i.e. it does not require any closing tag) that you can use to create maps. You can add the shortcodes via the built-in button in the editor [17] or manually.
Usage example:
[map latitude="56.481530" longitude="14.696218" zoom="12" height="300" style="dark" marker="red"]Option name Type Required Description latitude number Yes The latitude of the map (find it out here) longitude number Yes The longitude of the map (find it out here) zoom number No The initial resolution at which to display the map style value No The color style of the map. Allowed values: light, dark. Leave it empty if you wish to use the default Google Maps style. height number No The map height in px. Default: 200 marker text No The color of the marker. Allowed values: red, orange, yellow, green, light-blue, blue, purple, pink, brown, dark, white. Leave empty to not show it 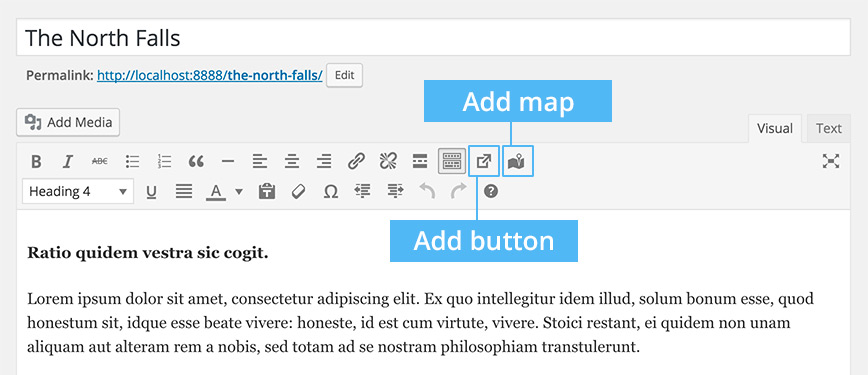
[17] Built-in shortcodes buttons
-
Social links
It's a self-closing shortcode (i.e. it does not require any closing tag) that you can use to insert the social icon links anywhere in your website. Don't forget to define your social URLs in the Customizer (be found in Appearance - Customize - Social Links).
There's no built-in button for this shortcode, you can only add it manually.
Usage example:
[social-buttons] -
Year
[current-year]is a bonus shortcode outputting the current year. You may need it to include the copyright note in the bottom footer.There's no built-in button for this shortcode, you can only add it manually.
Contact forms
Hemma takes advantages of Contact Form 7 plugin to create contact forms.
-
Install Contact Form 7 plugin
To create a contact form you need to install the Contact Form 7 plugin first.
-
Create and configure a form
Now that you've installed the plugin, you can see on the left sidebar a new menu item named Contact. Add a new contact form as explained here or use the code we have provided below:
<p>[text* your-name placeholder "Full name"]</p>
<p>[email* your-email placeholder "Email address"]</p>
<p>[text your-subject placeholder "Subject"]</p>
<p>[textarea your-message placeholder "Don't forget that kindness is all!"]</p>
<p>[submit class:button class:is-green "Send a Message"]</p>
As you can notice, we have added some extra classes to the
[submit]tag (i.e. the button) to have more control on the style. If your[submit]tag does not have any class (e.g.[submit "Send a Message"]) you will probably see a transparent button.To style the button, first thing to do is adding
class:button.
Now you can choose a color class (e.g.class:is-greenor any other color class in the blue box below).
Color class list
is-red, is-orange, is-yellow, is-green, is-light-blue, is-blue, is-purple, is-pink, is-brown, is-dark, is-white
Instagram feed
Starting from version 1.4.16 released in July 2024, Hemma takes advantages of Social Feed Gallery plugin to display the Instagram feed.
Good to know
As of version 1.4.16 (July 2024), we no longer recommend using the built-in Hemma Instagram Feed plugin. Instead, Hemma now integrates seamlessly with the Social Feed Gallery plugin to display Instagram feeds.
-
Install Social Feed Gallery plugin
Install the plugin first.
-
Set up the plugin
Go to the plugin settings and connect your Instagram account.
Create a new feed, and use the following settings:


Finally, add the feed shortcode to the composer block:

Theme translation
Hemma is completely translation-ready!
Translating the theme is simple and requires very little knowledge of the matter.
First, download a “.po” extension file editor like PoEdit. Now, navigate to the theme's folder (“hemma”) and open the folder named “languages”. Now, depending on the language you wish to translate the theme to, you will have to duplicate and rename the file "strings.po". For italian, the file must be renamed to “it_IT.po”, for German "de_DE.po" and so on.
How to name correctly your language file
Don't you know the equivalent id for your language? Visit: http://codex.wordpress.org/ WordPress_in_Your_Language
After translating the strings, save the file and make sure that a .mo extension file using the same name of the .po extension file is present in the folder.
Making Hemma multilingual
You can make Hemma multilingual thanks to the compatibility with Polylang and WPML plugins.
Hemma is compatible with both Polylang (a free WordPress plugin to create a bilingual or multilingual WordPress site) and WPML (ptobably the most popular multilingual plugin out there).
Polylang
If you need to create a multilingual site but don't want to waste money, then we recommend you to use Polylang. Let's get started installing and activating the plugin. Now you can configuring it as described in the plugin documentation.
If you added some bottom notes in your footer (Appearance - Customize - Footer Settings - Bottom Notes) and need to translate them, go to Settings - Languages - Strings Translations and fill the Bottom Footer Notes translation fields. Keep in mind that if you edit your bottom notes from Appearance - Customize - Footer Settings - Bottom Notes, you need to translate them again from Settings - Languages - Strings Translations.
Are there still unstranslated strings?
If you still see some untranslated strings in your website (e.g. “Prev Rooms”, “Next Rooms”, etc.) it's because you did not translated yet. Please refer to the Theme translation chapter for that.
WPML
If you want more features and control on your multilanguge site, you may need WPML plugin. Compared to Polylang, WPML is not free but requires a subscription and it may be more difficult to use if you're not confident with it.
Well, if you decide to go with WPML, install and activate the plugin: Hemma is fully compatible with WPML so you just need to configure at your own pleasure.
Add the Language Switcher to the header
The good news is that you can advantages of an additional language switcher to be placed in the header specifically built for Hemma theme. To activate it, go to Appearance - Customize - Language Switcher [18] and Enable the Language Switcher. In this panel you can also find a bunch of additional options to configure the switcher aspect.
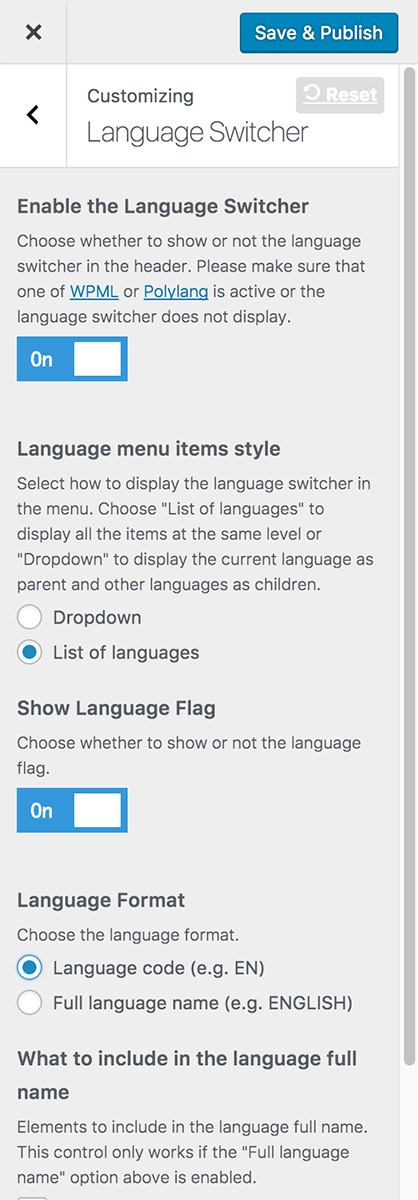
[18] Language Switcher panel
Import demo content
Sometimes one may need to import some demo content to quickly figure out how the theme works. Great, let's get started!
First of all, make sure that Hemma theme is activate and all required plugins are installed and active.
To import the demo content navigate to Tools - Import within your dashboard and select WordPress.
Install, activate and run the importer. Navigate to the 01-hemma-elegant-dummy.xml file included into the "Demo Data" folder, select it, hit Upload file and import and Submit.
After clicking Submit you may need to wait a few minutes depending on your internet connection as all of the attachments are downloaded from our demo site.
When done, navigate again to Tools - Import, select WordPress, navigate to the 02-hemma-elegant-dummy.xml file, select it and then hit Upload file and import.
Why images are blurred?
Because the images contained in the demo are only for demo purposes and we are not authorized to release them.
Go to Settings - Permalinks, select the option Post name and save.
Navigate to Settings – Reading, enable the option A static page under Front page displays and select Hemma as Front page. Finally, select your blog page (The Journal) as Posts page. Save changes. Now go to Appearance - Menu, tick the option Primay under Menu Settings and save or create a new menu for your website.
Update the links on your home page!
Remember that some URLs need to be updated! You have imported the demo content, great! Now if you navigate to your new home page and click on “VIEW ROOMS” button, you will be redirected to our theme demo (i.e. http://themes.opendept.net/hemma-elegant/rooms/). That happens because you need to update some URLS. Click on Edit page on the top bar, find and expand the Block 2. Now replace the URL in the Button link field with the URL of your room page (it should look like to http://yourwebsite.com/rooms/).
The WordPress Importer plugin is unable to import the footer widgets. Please refer to the Footer chapter to figure out how to configure your footer.
Why the imported demo is not multilingual?
That's because the WordPress Importer plugin is unable to import posts having the same title. If you need to make your website multilingual, please refer to the multilingual chapter.
Theme updates
You can update your theme by downloading a fresh copy from the store where you purchased it, deleting the current version you have on your server and uploading the new one.
Manual updates
It's recommended that you use FTP, but this also can be done with the WP dashboard if you prefer. The reason FTP is superior for this is because the theme won't have to be deactivated during the process so you won't have to reassign your widgets. If you're interested in keeping up to date with the latest changes and fixes, please refer to the file changes.txt located in the theme directory.
Empty the cache!
Please, remember to clear your browser cache after each update if you notice anything off. Old theme files can persist in your local cache and make you think something's wrong.
Enable automatic updates
You can decide to enable automatic updates installing an Envato plugin called Envato Market. Download the plugin and and unpack the envato-market.zip file. Upload envato-market folder to the /wp-content/plugins/ directory. Activate the plugin through the ‘Plugins’ menu in WordPress. Click the ‘Envato Market’ menu in WordPress and connect to the API. You will need to generate a personal token, and then insert it the setting page.
Now you will notified for any theme update released on ThemeForest. The best part is that you can update the the in one-click... Cool, isn't it?